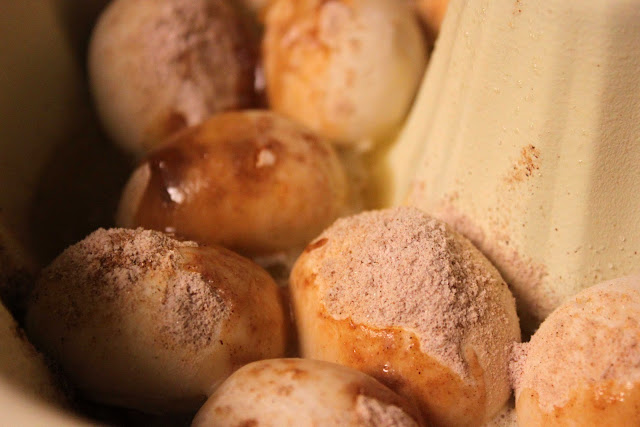
A week or so ago, I found this recipe via a linky party, and have been dying to try it.
The recipe (and corresponding nativity legend card) were found at My Computer is My Canvas.
Just like everything else, I changed it up just a tiny bit . . . not that it makes it mine, but maybe it'll get you thinking about what you would change, too.
We decided to try some different flavors. We used one bag of candy cane kisses on one half of the tray, and a bag of mint truffle kisses on the other half.
Also, we used the new pretzel M & M's candies instead of originals (although that was more out of necessity than anything else--they were the only ones in the holiday colors at the store,--but they turned out good, and I think I'll do that again when I make these for my neighbors.
These turned out to be the most delicious little treats ever!
They're a great, inexpensive idea for neighbor gifts this Christmas, since the number included in each little bag can be adjusted based on the size of the family you're giving them to.
One thing that was not mentioned in the original recipe that is helpful is that if you have a pair of little--maybe 5 & older--hands (or two) that are available to help, use them! Unwrapping all those kisses and placing all the M & M's can be a tedious task--although I wouldn't use tiny little hands because they're not steady enough not to knock the tray around and shift them all!!
Monday, November 29, 2010
Saturday, November 27, 2010
"fancy" table cloths
First off, I want to apologize for the wrinkled state of everything in the pictures.
I had every intention of taking pictures of the table as it was set, and before we sat down to eat Thanksgiving dinner. It didn't happen, however. I was running around finishing up the meal and being asked a thousand different questions by people trying to help, and I completely forgot until we had all started eating.
So, I set a table back up today (minus the dishes) so that you could see the table cloths I made for the big meal this year.
But that's real life, right?
So, without further ado, here it is:
I have nobody with any kind of expertise to back me up, but I'm going to declare myself an expert because this is the Internet, and you can do that right?
In my opinion, making a table look expensive/fancy is less about expensive fabric and more about layers.
Just like the layered look is "in" when it comes to fashion, I'm going to venture out and say that it's "in" for table decor, as well.
So, all of my fabrics are some kind of cotton. That way they can be easily laundered (because we eat dinner with little people, and little people {and I} make messes.)
The white table cloths are one large rectangle, which I measured to go floor to floor on the table I would be using.
The yellow squares are 45" by 45" and simply serged around the outside. I placed them on the table overlapping in the middle with a corner hanging off each of three sides.
Finally, the table runner is long enough to run the length of the table and hang half way down the ends of the table to the floor (at the point.) I then added a tassel for an extra touch, which the 3-year-old troublemaker loved and declared her best friend because she had to hold it in her hand and stroke it gently the rest of the day.
I topped the whole thing off with the candle jars I made . . . oh, and dishes, of course.
Once again, I tried to make things cost efficient by using colors that can be reused, like white underneath, and the red table runner for Christmas. All I'll have to do is make some new squares in green!
Friday, November 26, 2010
black friday luck
I never participated in Black Friday before my husband. Since we were married, however, we have not missed a year.
This year, however, was the perfect storm for not going . . . very little money to spend + getting up at 5 am on Thanksgiving to prepare the meal + a sick husband = "sleeping in" until the kids got up at 7 am on Black Friday.
I didn't even look at the ads until this morning at about 9 am.
And that's when I noticed that JoAnn's had their flannel prints on sale for $1.29 per yard (and my troublemakers need pajamas!)
So, I tried to get the kids all dressed, fed, and set up with a movie as quickly as possible, and then left them in the care of their still ill father while I ran out to see what was left.
I had heard that the line for the cut counter at JoAnn's on the day after Thanksgiving is long, but this was ridiculous! They have a "Take A Number" dispenser, and on a day like today, it had been loaded not only with the numbers 1-100, but they were alpha-numeric.
I pulled a number: D52.
The current customer: C18. More than 130 people in front of me. (sigh.)
I started asking around. People had been there for four hours just waiting for fabric to be cut!!
So, while I decided whether or not to stick it out, I wandered the aisles. That's when I saw it on the shelf.
I looked down, blinked, and then picked it up.
I apparently wasn't the only one who thought about throwing the towel in when I found out how long the wait was because I was staring at ticket #C21!!
What luck! I skipped my way back to the cut counter and waited a mere five more minutes to have my fabrics cut.
I then hurried up to the front of the store to check-out. That line was not so lucky, but it was good for a laugh.
When you're in a line for 30 minutes, you tend to talk to the people around you. Turns out, the twoolder mature ladies in front of me had ventured out on Black Friday to buy sewing needles and bobbins, neither of which was on sale.
I giggled a little as I thought, "You have to be a special kind ofstupid desperate to wait in line for 30 minutes for needles and bobbins!!"
The good news is that I got enough flannel to make 7 sets of pajamas for just over $20, which comes out to less than $3 per set!! Score!
This year, however, was the perfect storm for not going . . . very little money to spend + getting up at 5 am on Thanksgiving to prepare the meal + a sick husband = "sleeping in" until the kids got up at 7 am on Black Friday.
I didn't even look at the ads until this morning at about 9 am.
And that's when I noticed that JoAnn's had their flannel prints on sale for $1.29 per yard (and my troublemakers need pajamas!)
So, I tried to get the kids all dressed, fed, and set up with a movie as quickly as possible, and then left them in the care of their still ill father while I ran out to see what was left.
I had heard that the line for the cut counter at JoAnn's on the day after Thanksgiving is long, but this was ridiculous! They have a "Take A Number" dispenser, and on a day like today, it had been loaded not only with the numbers 1-100, but they were alpha-numeric.
I pulled a number: D52.
The current customer: C18. More than 130 people in front of me. (sigh.)
I started asking around. People had been there for four hours just waiting for fabric to be cut!!
So, while I decided whether or not to stick it out, I wandered the aisles. That's when I saw it on the shelf.
I looked down, blinked, and then picked it up.
I apparently wasn't the only one who thought about throwing the towel in when I found out how long the wait was because I was staring at ticket #C21!!
What luck! I skipped my way back to the cut counter and waited a mere five more minutes to have my fabrics cut.
I then hurried up to the front of the store to check-out. That line was not so lucky, but it was good for a laugh.
When you're in a line for 30 minutes, you tend to talk to the people around you. Turns out, the two
I giggled a little as I thought, "You have to be a special kind of
The good news is that I got enough flannel to make 7 sets of pajamas for just over $20, which comes out to less than $3 per set!! Score!
Wednesday, November 24, 2010
candle jars
I'm not a "Martha Stewart" type of girl . . . don't get me wrong, I think her stuff is beautiful. I just don't have the time, energy, or budget to attempt even half of the stuff she would for a Thanksgiving meal. I'm a firm believer that less is more.
With that in mind, my husband and I are hosting his family for Thanksgiving at our house. I've been pretty excited to put a little extra work in and make some new table cloths, table runners, and center pieces.
Hmm . . . centerpieces. There are so many beautiful ideas out there, but we have to keep in mind that I'm a minimalist and I don't have a ton of resources at my fingertips.
Would you like to see what I came up with? Of course you would because it's the day before Thanksgiving, and anything I possibly did as a centerpiece, you would still have time for, if you wanted:
Drumroll, please:
Candle Jars!!
This idea was inspired by an idea I saw at Crazy Domestic for Halloween which involved making Monster Jars. The only real changes I made were to increase the amount of laziness put into the craft by simply not putting the faces on the outside.
I decided on red, yellow, and green to represent fall leaf colors. (The Wal-Mart by my house didn't have orange or brown tissue paper.)
I also thought this made them more versatile since I can use the red and green when Christmas comes around in two days, and I can make more in a variety of colors for Easter, 4th of July, baby showers, birthdays, etc.
I prefer to light them with candles,
but I spray painted the lids silver just in case I ever decide to use white Christmas lights to light them instead. (The lid snuffs the candle out if you put it on while lit.)
This was a simple project that took less than 2 hours total, although there was waiting time in between coats of Mod Podge, so jump in! You still have time, if you hurry!
Wednesday, November 17, 2010
men's shirt . . . uh, shirt
I mentioned making Rora several tops for her birthday. I loved the shirt dresses I made for her, and she practically spent her whole summer in them, but they're too small now, they're not great for fall/winter fashion, and Rora's getting a little too tall to be able to make new ones from a men's shirt because I can't make them long enough.
So here's my compromise:
I used the pattern I had made from Dana's Men's Shirt Dresses, except I narrowed the bottom, and made it shorter so that it was a long top instead of a dress.
I eliminated the contrasting waistband and instead used two loops and a thin tie for the middle.
**Tip: If I've learned anything from making Dana's Shirt Dresses and these new Men's Shirt Tops, it's that you want to pick out shirts with some kind of pattern or texture. Plain, one-colored shirts look pretty flat when compared to a shirt with plaids, stripes, or some kind of texture (like a red-on-red pin stripe.) Remember that you are making this for a little girl, not your husband, so sometimes the most ridiculous looking men's dress shirts make the cutest little girl tops/dresses.**
Disclaimer: It was windy the day we took the pictures of this shirt, so please excuse the weird faces,
the flyaway hair,
and the apparent frustration!
Tuesday, November 16, 2010
felt princess crown
The hit of Rora's birthday this year was the gift that took me 10 minutes to make!!
I made her a felt princess crown that she just loves. She's worn it almost non-stop for the past 3 days.
I made up my own pattern for this (gasp--I know!) and threw it together very quickly. So, if you want to make your own, here's how:
I didn't think about a tutorial for this because it was a last-minute idea, so I don't have many pictures, but I think it's easy enough to understand. If not, I can whip up another one and post a tutorial.
First, I measured Rora's head: 19-1/2 inches.
Next, I began making my pattern by measuring 9" from one side to the other. (The piece was cut on the fold, making the total length 18 inches.)
After measuring 9 inches, I created the shape I wanted with the highest point in the center, and a smaller point next to it, with the back just a basic strap.
I placed my pattern on the fold and cut one from each of two different colors of felt.
After that, I layed the pieces over the top of one another and sewed around the edges, as close to the edge as possible, leaving the back ends open.
The next step was to cut 2" of elastic for the back. This will make it so the crown can grow with her a little bit.
I inserted 1/4 inch of each end of the elastic into the end of the back of the crown and sewed it in place, leaving just less than 1-1/2 inches showing in the back.
The final touch was the diamond in the front of the crown, which I drew on with a pencil, stitched over my lines, and then carefully cut only the top layer of felt so that the under layer would show through.
And ta-da! A crown fit for a princess.
This process could also be used in different shapes for a king, or a fun birthday crown.
Labels:
accessories,
auds' patterns,
birthday,
costumes,
girl,
hat,
tutorial
Thursday, November 11, 2010
dana's 90 minute shirt
Besides sewing along with Jill, I have several projects in the works.
Rora's birthday is this Saturday, and she is in desperate need of some new clothes! She outgrew all of her 3T clothes about a month ago, and I've been trying to stretch her out until her birthday. My sister, Vivian is contributing to the new wardrobe, and I've been sewing like crazy with more projects on the way!
Yesterday, I made one of Dana's 90 Minute Shirts. This being my very first one, it took me about 2 hours to complete (not including making the pattern.)
I loved how it turned out, but I think it might need some embellishing.
Now, back to my stack of sewing projects to outfit my little girl!
Monday, November 8, 2010
gluten free treats
I have a good friend with Seliac's disease, who is also lactose intolerant. It sounds like a rough existence to me, but she insists that it's really not that bad once you understands your limitations.
So, when we go to a game night, or some other such gathering, and the invite reads, "bring a treat to share," I like to make sure that whatever I bring is gluten/dairy free so that my friend has something to eat, too. There are a few staple items that I always brought (like Swedish Fish and corn tortilla chips with salsa,) but more recently, I decided I wanted to branch out a little.
I double-checked everything with my friend, and now have a recipe to share with you for Gluten Free Chex Treats!!
These are much like Rice Krispie Treats, except I used Chex. If you've never cooked gluten-free before, please read the directions carefully because there are a few helpful little tips.
Chex Treats:
6 cups Gluten Free Corn/Rice Chex
10 oz bag marshmallows
1/4 cup butter
1 tsp vanilla
1. The first rule for cooking gluten-free is to hand wash everything you are going to use before starting. (IE: measuring cups, measuring spoons, pan, bowl, etc.) If anything you use has been contaminated by any form of flour or other gluten, it can't be eaten by someone with Seliac's disease.
**When cooking something gluten-free from scratch, I usually open a new bag of sugar because I am constantly using the same measuring cup for our flour and sugar, which means the canister of sugar on my counter is contaminated.**
2. Make sure you are using gluten-free Chex, and original cooking spray. While I'll be the first to admit that the Baking Spray is magic in a can, it defeats the purpose of cooking gluten-free if you use something with flour in it!!
3. Spray your glass pan with cooking spray so that your treats will come out easily.
4. In a large pot, melt the butter over medium heat.
5. Add vanilla and marshmallows and melt until smooth, stirring constantly.
6. Remove from heat. Stir in Chex. Continue stirring until all pieces are evenly coated.
7. Press Chex into a glass pan and allow to cool.
8. Cut into squares and serve. Store any uneaten treats in an airtight container.
Linked to:
Tuesday, November 2, 2010
bubble bread
I got this recipe from a friend while my husband and I were living in the married student housing at the University of Utah.
It's super easy, since most of the work is done while you're sleeping.
Bubble Bread:
18 frozen Rhodes rolls
1/2 pkg. cook & serve butterscotch pudding (not instant)
1/2 tsp cinnamon
3/4 cup melted butter
1/2 cup brown sugar
1/2 cup chopped pecans (optional)
1. Prepare (cooking spray or butter) a bundt pan and drop rolls into the bottom of the pan.
2. Mix butterscotch pudding and cinnamon in a bowl, and then sprinkle over rolls.
3. If you choose to add pecans, now is the time to do it (but we're not nut people, so no picture.)
4. Mix melted butter and brown sugar in a bowl and pour it over rolls.
5. Cover with buttered or sprayed piece of foil.
6. Let rise overnight (about 9 hours.)
7. Remove foil and bake at 350 degrees for 30 minutes.
8. Invert onto a plate and enjoy!
Subscribe to:
Posts (Atom)