Wednesday, June 23, 2010

men's shirt sleeve hem

My husband finds dress shirts that he likes all the time, but his biggest problem is that he hates long sleeves with a fiery passion!! So, I have spent a lot of time cutting off and hemming shirt-sleeves for him. Since this can be such a useful task in stretching a family's budget, I thought I would show you all how I do it.

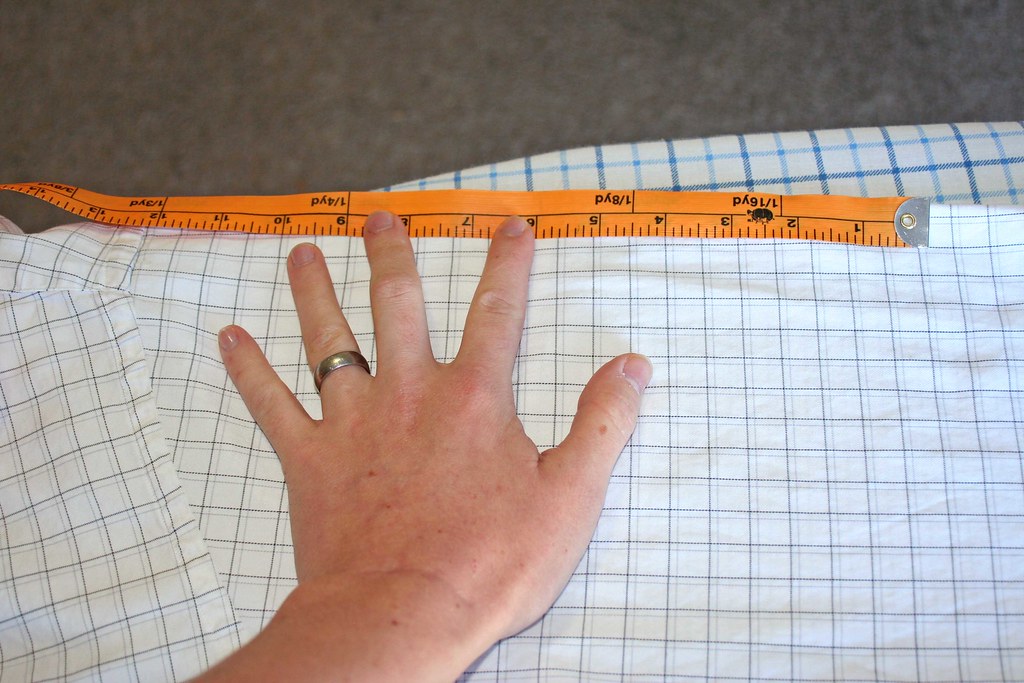
First, find a shirt your husband already owns, which has a sleeve length that he likes. Lay it out flat (iron it if you must,) and measure the top and bottom of it:


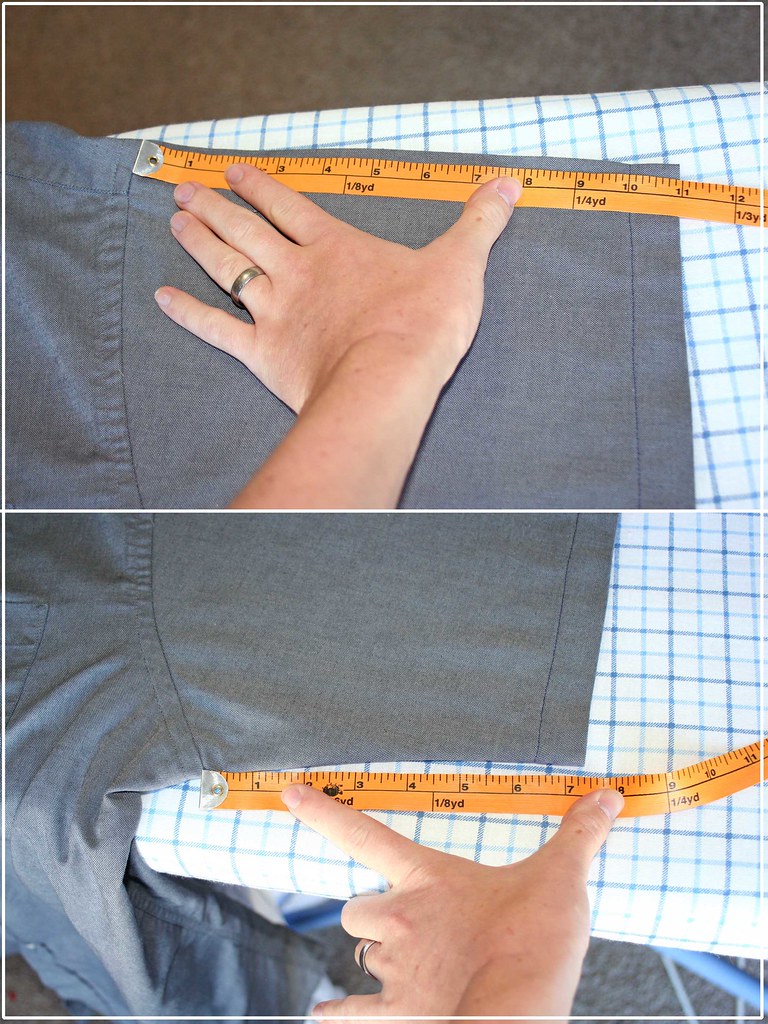
You will need to add 1 and 1/4 inches to each measurement to allow for the hem.

Next, take your bottom measurement (+ 1-1/4") and measure out from the armpit on the sleeve you want to cut off:
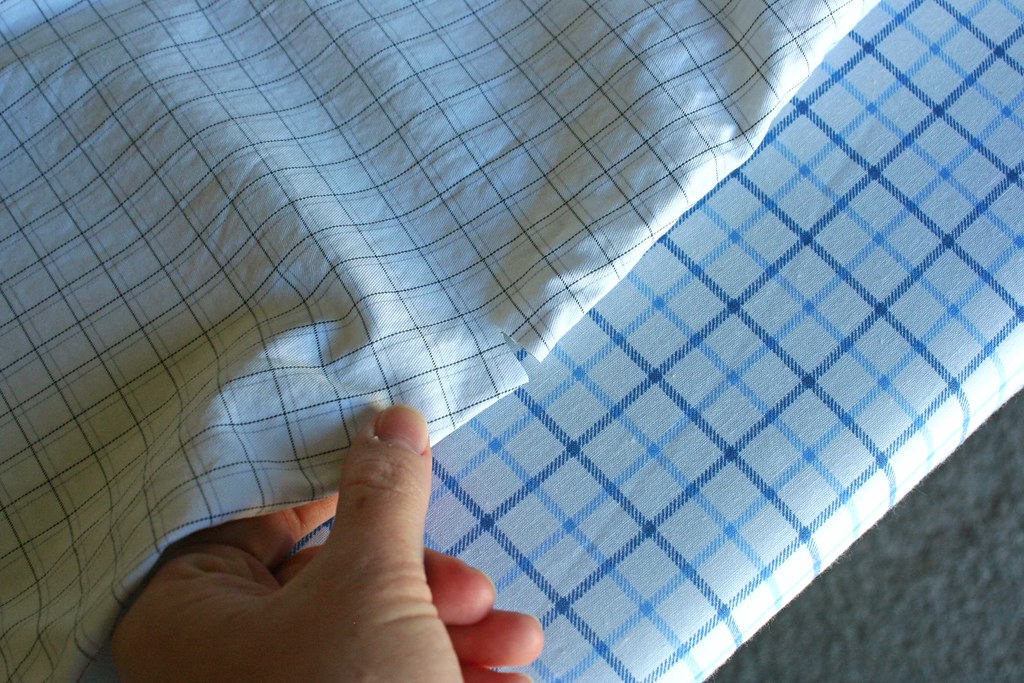
Make a small cut:

Do the same for the top (except use the top measurement + 1-1/4".)

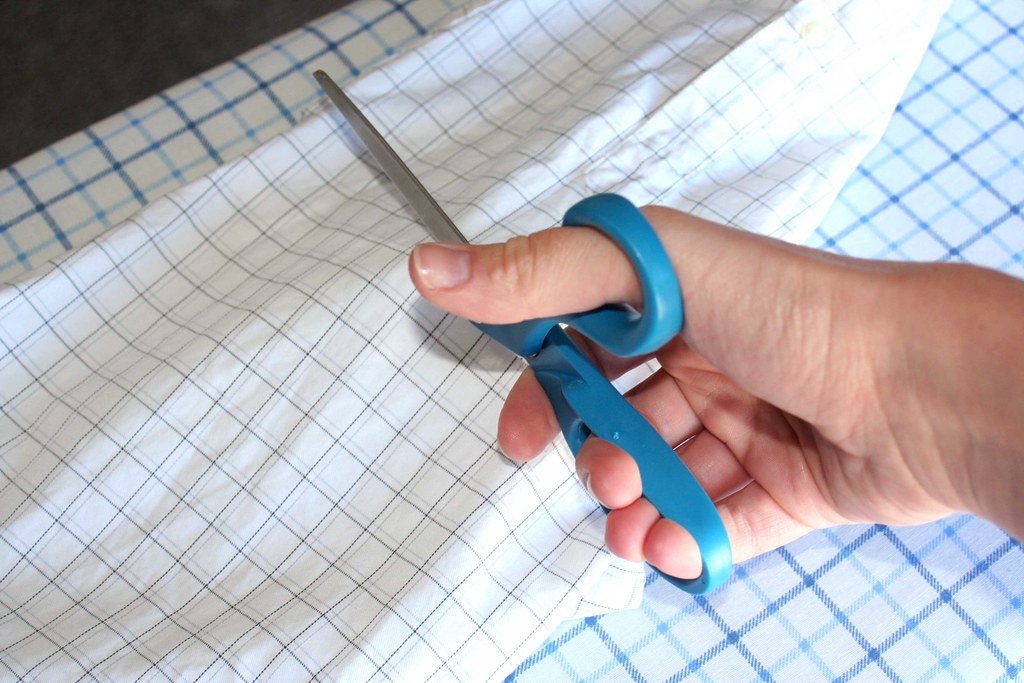
Insert your scissors in the hole and carefully cut only the top layer from one marking to the other. (I just eyeball this, but you could take a ruler and some fabric chalk to mark it before cutting, if you want.)

Turn the sleeve over and cut the other side from one mark to the other. Keep your scissors lifted slightly so you don't cut the bottom side.


After finishing both sleeves, if you have a surger, surge around the bottom edge of your sleeve. (If you don't have a surger it's not a problem.)

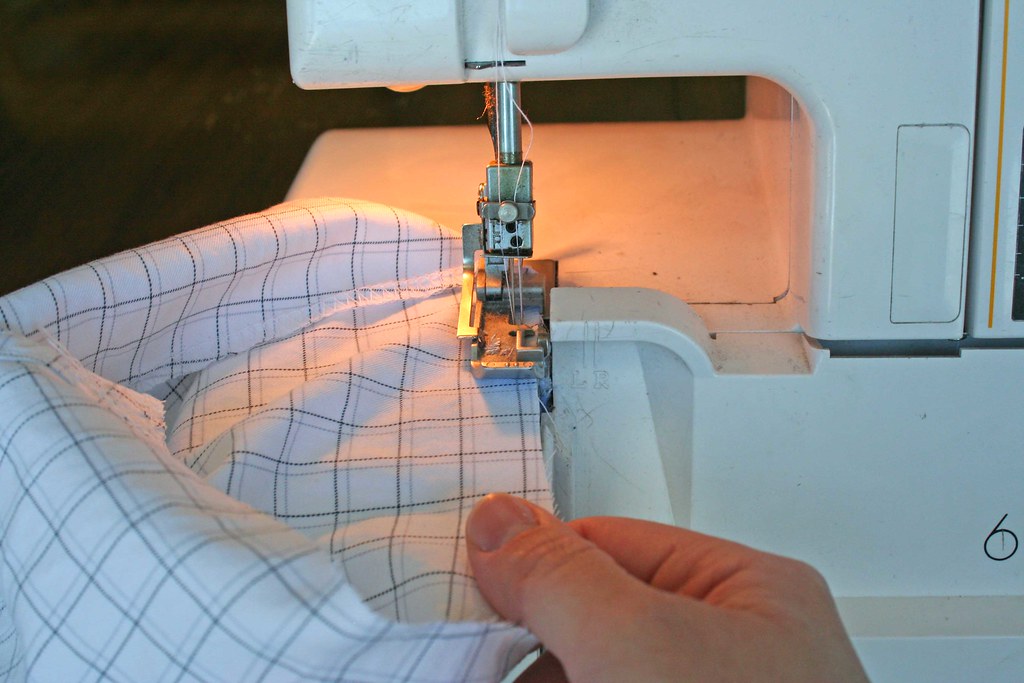
Next, fold the edge of the sleeve down 1/4 inch (or the width of your surge,)


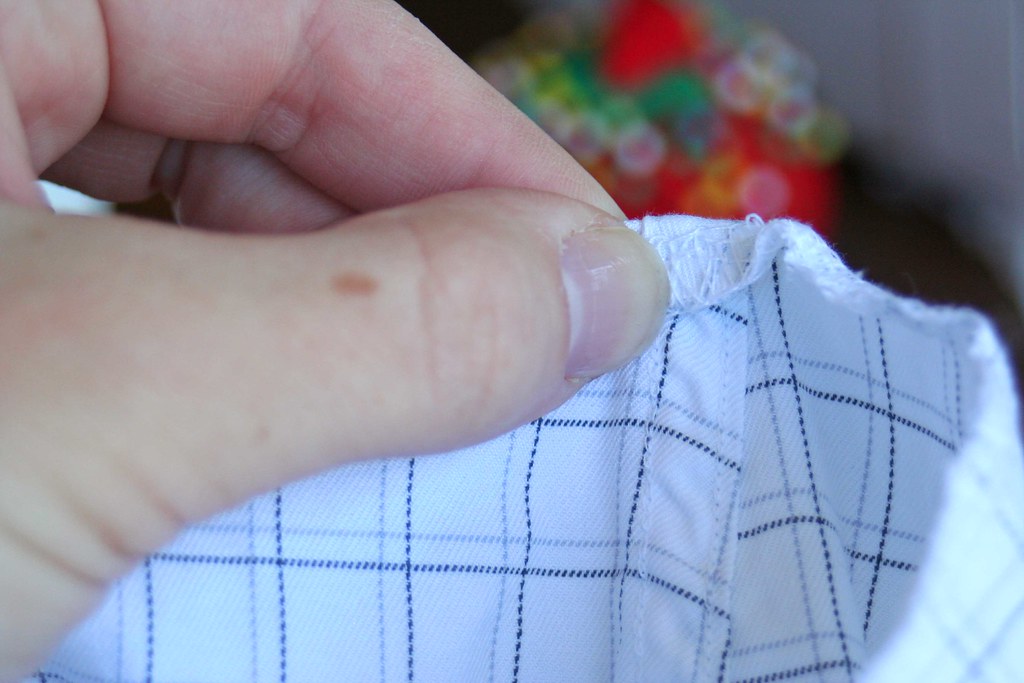
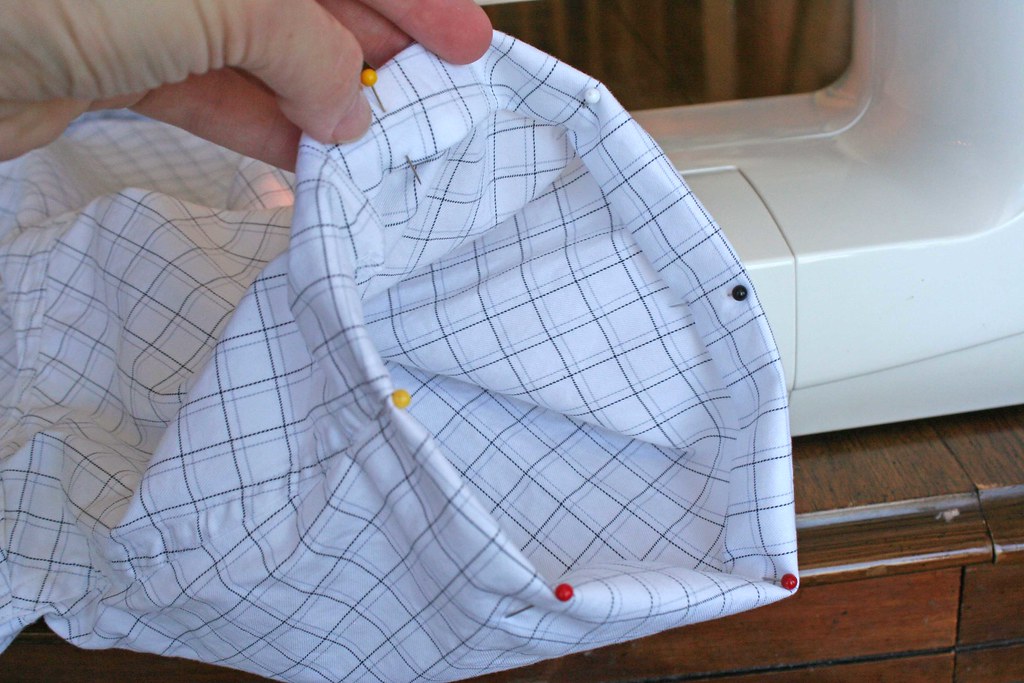
then fold it down one inch and pin:


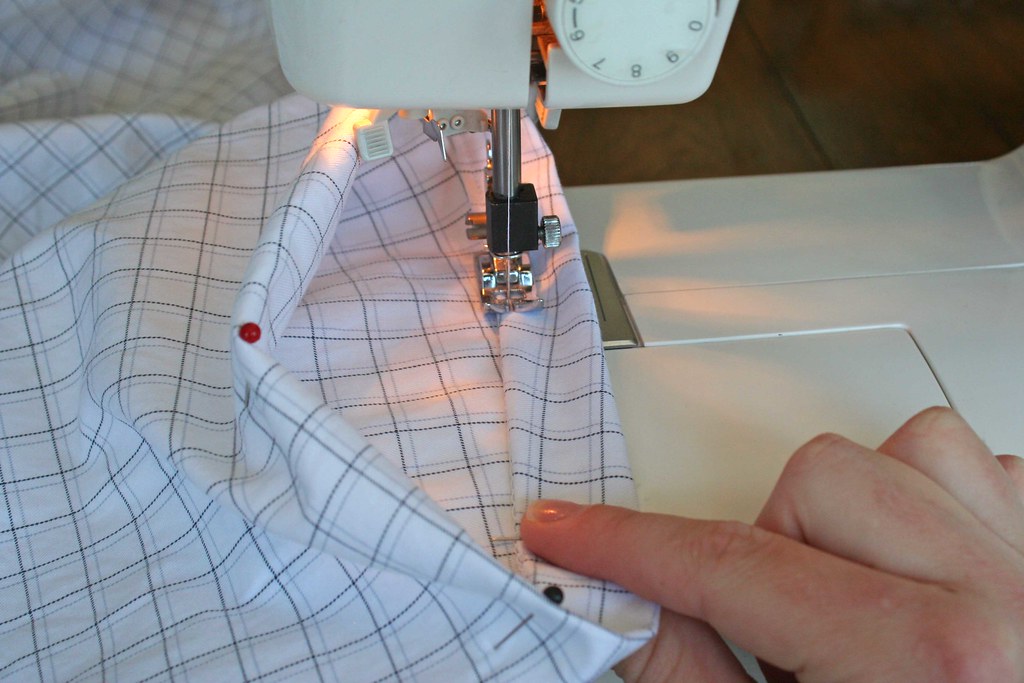
Measure and pin all the way around each sleeve (I use roughly 6 pins on each:)
Sew where you have pinned, stretching between pins slightly so that everything lays flat.


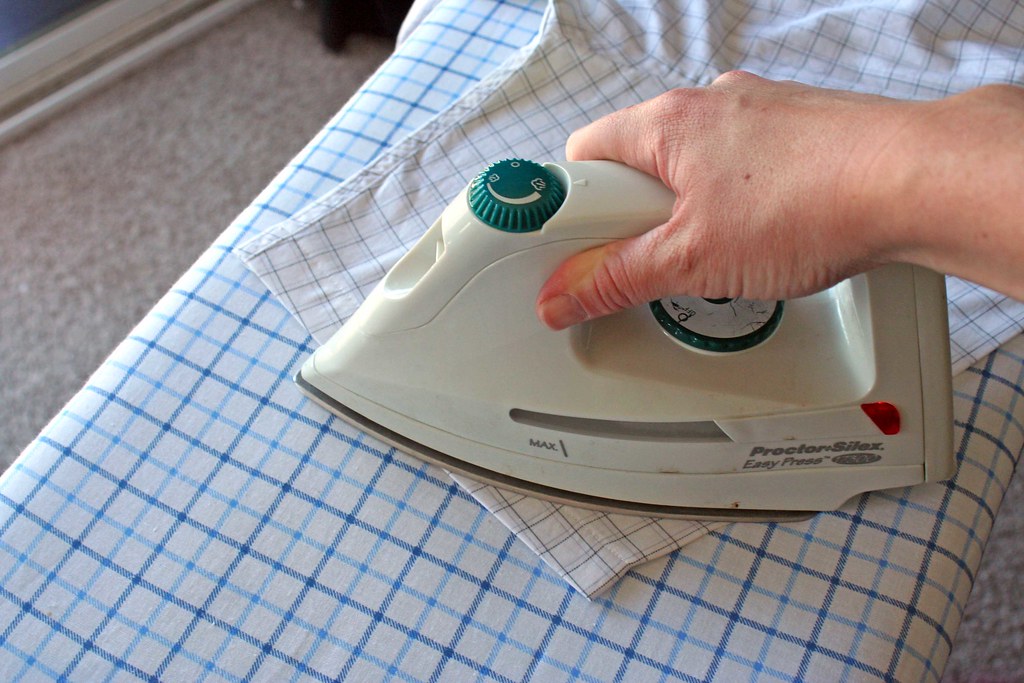
When you are finished sewing both sleeves, lay it flat on the ironing board and give it a good press:


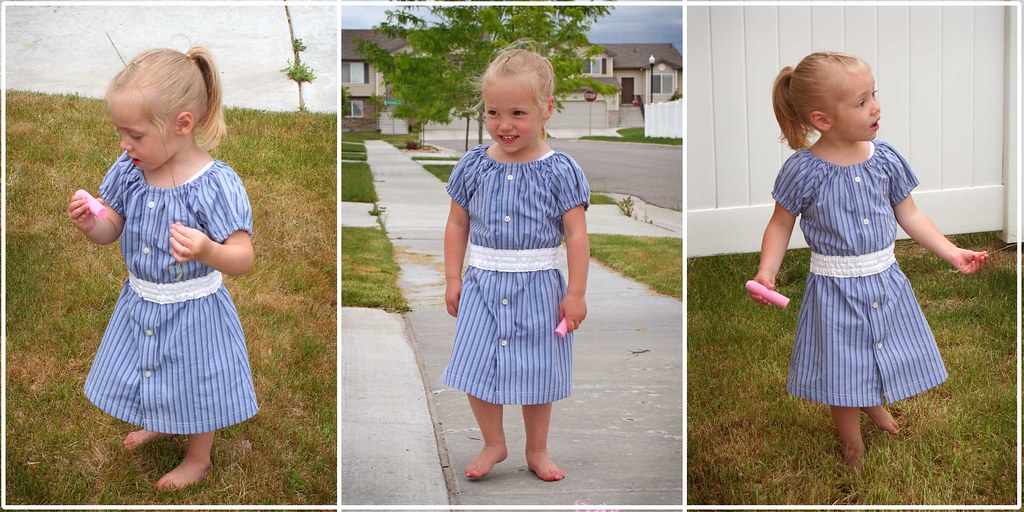
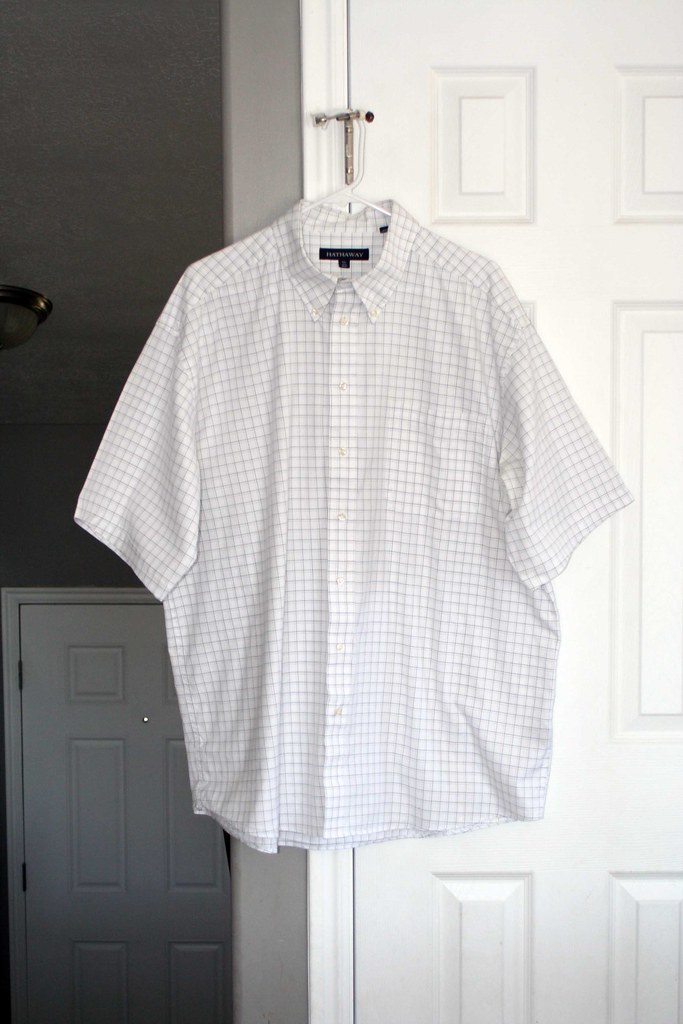
You have now converted a long-sleeved shirt into a nice, comfy, short-sleeved one. Ta-da!!

Tuesday, June 15, 2010

dana's shirt dress

My sister, Vivian showed me the adorable tutorial on MADE for a little girls' summer shirt dress. Two days later, my brother-in-law brought over a whole pile of his old dress shirts to see if my husband wanted them before he donated them to the DI.

So, I snagged one of them from my husband and turned it into a shirt dress for Rora.

The most difficult part of the whole project was making my pattern. Rora is the same size as Dana's daughter, but I had the hardest time figuring out how to make the top curve of the sleeve 10", with the bottom curve measuring 14". I never did figure it out - I just ended up making the top curve of mine 7" and the bottom curve 14". (If someone can show me, I would love it!!)

Either way, I was really happy with how the dress turned out:

Rora loves it so much, I couldn't get her to hold still long enough for me to get a good picture of her in it!

Monday, June 14, 2010

long lost baby pea coat (butterick 4009)


The inspiration for this project sort of came from two places. Originally, I wanted a beautiful coat to go with my daughter's blessing dress.

More recently, I was reading this post on Made by Heidi, in which she talks about living on a student budget and doing all her crafting out of her current supplies in her craft closet. I started to think about the dark corner of the house in which I keep all of my crafting supplies (which is, in all fairness, just the floor space underneath the shelves in my linen closet.) I realized that it was starting to get a wee bit crowded in there and could use a cleaning.

I began pulling out bag after bag after bag of yarn, hair clip supplies, leftover scraps, thread, etc, etc, etc. The floor space in the linen closet started to seem more like Mary Poppins' bottomless carpet bag than ever before. While I'm not crazy enough to try to last a full year using nothing but the supplies in my closet, I also didn't want things to get so out of hand that my children will eventually have to dig my crazy self out of my crafting world to put me in a home for the mentally unstable . . .

One of the things I found at the bottom of the mess were the supplies for this baby pea coat. I had planned on making this coat for my daughter when she was about two months old--she is now 2-1/2 years old (oops.) This pattern is so old that it is out of print. Now seemed like as good a time as any to make it.


It is a beautiful, fully-lined coat. It required a lot of hand stitching (slip stitching,) but when I finished it, I was glad that I decided to sew it even though my daughter is way too big for it now.

Turns out there might be a reason the pattern is out of print. I cut out a size small, which should be roughly a 3-6 month size coat. I followed the directions and seam allowances exactly, yet it is actually the same size as a 12 month coat.

Tuesday, June 8, 2010

rag tag baby blanket


When my daughter was born, a very sweet woman at my husband's work made us a blanket that I love. I decided to copy it when a friend of mine had twins. It was a learning experience, and I will be giving you directions the way I would have changed things.

To make this blanket, you will need 1 1/2 yards of each fabric (I only used 1 yard of each, and the blankets I made were a touch too small):

cute cotton fabric for the top,
thin flannel fabric for the middle layer, and
sturdy flannel fabric for the backing

After washing, cut fabric into 8" x 10" rectangles. You will need 24 rectangles of each.


Layer fabrics with one of each panel, and sew and "X" through all three layers.


When all your layers are tacked together, begin sewing the rectangles into rows, with the seams toward the top layer. Sew six rectangles together along the long side with a 5/8" seam--you will end up with four rows.


Attach the four rows to one another, making sure to line up the seams. (Once again, make sure the seams are toward the top of the blanket.)


After sewing everything together, you are about half done. The rest of the process is long and tedious, but a good project to do while watching a chick flick.

Carefully cut the seams for fraying. Be careful not to cut through your stitching, or you'll have to repair it when you're done.

Besides the blankets needing to be 4 rectangles x 6 rectangles, I also learned that the fun fabric should be the one on the top, with plain fabrics in the middle and on the back. No matter how cute the back of the girly blanket was, overall is wasn't as cute because you can't see the back that well.


Saturday, June 5, 2010

a labor of love

This quilt really was a labor of love. It has been about a year since I finished it, but it is still one of the projects of which I am most proud.

It all started when my mom retired from teaching sewing, and upon going through all her old stuff, we found this little gem: The Best of Miniature Quilts Volume 2. Inside it were 18 patterns, with directions, for some of the most beautiful, incredibly detailed quilts I had ever seen. They were all miniature quilts meant to be hung on the wall, but I had other plans. I asked to "borrow" the book, and have never returned it--sorry, Mom!!

The pattern I fell in love with was called Don't Tread on My Heart, and I wanted it for my little girl's twin bed when she moved out of the crib. With finished dimensions of 20 1/2" x 29 1/2", it obviously needed some adjusting for a twin-sized quilt.

I enlarged the pieces to twice the size in the book, and then cut out enough fabric for twice as many hearts as it originally asked for. The original quilt pattern was for only the area inside the red box in this picture:
As you can see, I added quite a bit. The whole quilt ended up being over 740 pieces!


I also created my own design element that got a lot of funny looks. I can't even count the number of times I heard, "Why are the corners cut out?"

Although it might look ridiculous laying out flat, the corners being cut out made it so that the quilt could be laid on a day bed, or a bunk bed without bunching on the frame, like so:


For the first time in my life, I hand quilted a quilt, and even though it took several months with my young children laying under the quilting frames, I think it was well worth it. Someday, I hope to be able to provide each of my children with at least one hand quilted piece quilt.


Saturday, May 29, 2010

a (very) full skirt (mccall's 5631)

Since the rule is that you can't wear white until after Memorial Day, I thought it appropriate to make myself a white skirt, and post about it on Memorial weekend. I wanted something full and fun, so I chose McCall's 5631.


I chose this view (maybe because I wanted white, and maybe because I liked the hem line on it, but it was this view nonetheless:)


I used a white on white calico print from JoAnn's for my fabric. Since it was white, I decided to add a lining, which the pattern does not call for . . . after all, I want what is under the skirt to be left to the imagination! I also added four inches to the length, but that is because of my freakishly long legs. (Finished length on the pattern is 23".)

The sewing itself was not that difficult, but more time consuming than it originally appeared. The pattern asks you to pleat the main fabric, and then gather it to fit the waistband. Can you just hear the skirt getting fuller and fuller by the second?


And this is the final product. Fuller than the picture on the front of the pattern, but still more or less what I expected. I like it, but I'm not as in love as I wanted to be.


I do, however want to try it again in a darker fabric so that I don't feel the need to line it, and see what that does to the volume.

Now I have a conundrum that maybe someone out there can help me solve:


To this point, I have never owned a white skirt. There are four very good reasons for that, and they are ages 6, 5, 2, and 8 months! It seems that any time I try to wear anything white, my freshly bathed children appear before me looking like this, wanting hugs and kisses and wiping their faces all over my clothing:


I have seen other mothers wearing white, and I have to ask myself whether their children just never get dirty, or white is more forgiving than I'm giving it credit? Any thoughts?

Wednesday, May 26, 2010

bubble dress (butterick 4176)

Sometimes when I sew, I need an ego boost, so I like to finish a project in just a few hours. That's what this pattern was for me when I bought it.

Just before making it, Sarah and I were talking one day, and she said, "I saw (insert cute friend's name here)'s girls wearing the cutest bubble dresses at church on Sunday!" The wheels in my head started turning, and I decided to make this dress with a bubble hem:


I wanted to make this view without the sleeves, so I cut out a lining in my daughter's size (size 2.)


Next, I cut out my main fabric, which was a silky print from JoAnn's, from this view, except I cut the hem line all the way to a size 5, and widened the skirt area by about 20 inches.


After sewing the side seams together, I ran a gathering stitch around the hemline of my main fabric and sewed it to the lining right sides together, gathering the main fabric to fit.


I then made the rest of the dress as the directions said.


Just like any dress for a little girl, the most important quality is that it makes her feel like a million bucks, which this does for Rora!


I love the three-button detail on the front:


I also like the simple one-button back closure:


And the final perk to this little dress is that I can add a cute colored ribbon around her waist or an adorable sweater to change up the look a little bit.

This pattern gets two thumbs WAY up!

Monday, May 17, 2010

stylish head gear part II

A bald head and sunshine do not mix.


Problem solved with a little help from You Can Make This. I used the same pattern as on this post.

Sunday, May 16, 2010

attractively bunchy (mccall's 6034)

My friend, Sarah of Sew Saucy turned me onto leggings last year, and I have fallen hard for them. For the Disneyland trip, I wanted to look cute, so I decided to attempt sewing something for myself again. I picked out this pattern, but decided it needed a few alterations, so here's what I did:


I wanted the main body for view A:


except with the collar/sleeve line from view B:


with the band on the bottom of view C (I have a thing about having my bum covered while wearing leggings:)


I've got to be honest. The alterations were not easy, and I don't even know how I would go about a tutorial for them, or even duplicating them, but I love the end result!


**One word of warning for view A . . . there are pleats in the back which tend to accentuate a girl's rear end. I wasn't that worried about it since I have kind of a flat rear end, but it would definitely be something to be aware of should you decide to make that top.**

Saturday, May 15, 2010

next year's dress (simplicity 3943)


I made this Easter dress for Rora this year. During the sewing process, I realized it was going to be too big for her and got discouraged. I finally finished it today (1 month later.)

Could I have altered it to fit her . . . sure, but since it was going to be 2-3 inches too big around and roughly 4 inches too long for her, I just decided to make it true to size and let her grow into it.


The sizing was no fault of Simplicity's. The dress will fit the size girl it measures to on the back of the pattern. I guess I just hoped that Rora could fit into a size 3 because those patterns are so much cuter than the toddler patterns!

Friday, May 14, 2010

a disney miracle (simplicity 3543, new look 6131)


This past week, my family and I went on a trip to Disneyland with my husband's family! It was tons of fun, and as a little surprise, I told the kids I had written to Mickey to let him know that we were coming.

When we got to California and checked into the hotel, we left for a walk, during which time Tinkerbell stopped by and left each child a pair of pajama pants!

The kids were all so excited! I only took a quick picture of my daughter's, and one of my sons' pajamas, but there were five pair in all.

The infant pajama pants were made from Simplicity 3543:


And the bigger kids' pajama pants were made from New Look 6131: