This costume was from two years ago when Rora was 11 months old. I used Simplicity #2788:
She made the sweetest little lamb ever.
I tried and tried to find a little bell to put on the front of her costume, but couldn't find anything satisfactory, so I went ahead and took her pictures without it.
On Halloween day, my sister called me to tell me she and my mom had found it while they were out and about!! She brought it up to me that night and I put it on just before Trick-or-Treating.
I have to say that it totally completes the costume!
Thursday, October 7, 2010
Tuesday, October 5, 2010
the monkey (simplicity 3594)
Time to show you another costume!!
This was from three years ago when Xavier was 2-1/2 years old. It was super cold that Halloween, and I made him into a little monkey using Simplicity #3594. The costume and the pattern themselves were not super complicated, but if you're going to use faux fur, just know that you're in for a challenge.
Overall, I love this costume, but it still kills me that I didn't realize until too late that the fur was definitely directional, and if you look close, this little monkey's fur is growing up his body, not down.
If you want something more simple, the vest could easily be made and put on top of brown clothes, but the hat (also easy) would have to be mounted on some sort of headband, or something.
This was from three years ago when Xavier was 2-1/2 years old. It was super cold that Halloween, and I made him into a little monkey using Simplicity #3594. The costume and the pattern themselves were not super complicated, but if you're going to use faux fur, just know that you're in for a challenge.
Overall, I love this costume, but it still kills me that I didn't realize until too late that the fur was definitely directional, and if you look close, this little monkey's fur is growing up his body, not down.
If you want something more simple, the vest could easily be made and put on top of brown clothes, but the hat (also easy) would have to be mounted on some sort of headband, or something.
Monday, October 4, 2010
clown costume (mccall's 6142)
During the past 7 Halloweens, I've made a lot of costumes. For my kids, other peoples' kids, adults, etc.
I didn't keep pictures of all of them, but I'm going to share the ones I do have pictures of during the month of October.
I have several criteria for making costumes:
1. It would be nice if it's not form-fitting, so that another child of different proportions could possibly wear it later.
2. It is preferably gender neutral, but I realize that's not always possible, so that rule is bendable.
3. I try to do the best job possible so that the costume is good quality and will last for many years.
I didn't keep pictures of all of them, but I'm going to share the ones I do have pictures of during the month of October.
I have several criteria for making costumes:
1. It would be nice if it's not form-fitting, so that another child of different proportions could possibly wear it later.
2. It is preferably gender neutral, but I realize that's not always possible, so that rule is bendable.
3. I try to do the best job possible so that the costume is good quality and will last for many years.
So, my first costume I ever made was a clown costume for Samuel from McCall's 6142.
It was a very easy pattern, but the first year, I decided to only do the fabric because I don't really like pom poms that much, but couldn't decide what I wanted to do to embellish it.
| (Sorry the picture is grainy. It's old and was taken on a 2.0 MP camera! *gasp*) |
Sometime before Xavier wore it, I added over-sized buttons to the front (and discovered the magic of face "paint.")
| Isn't he ADORABLE?! |
If you're looking for a clown costume, this one is simple and quick - and it comes with adult pattern sizes, too!
Friday, October 1, 2010
birthday fun!
Yesterday was two of my little troublemakers' birthday. That's right--my oldest and my youngest were born on the same day, six years apart.
You would think that with 365 days in a year, I would be able to give my kids each their own special day . . . nope!!
It's been a lot of fun so far because Samuel (my oldest) is so smitten with his baby brother, and Zoram (my youngest) is only 1.
We had a fun day yesterday, and there was not much money spent, so I thought I would share a few fun celebration ideas with you:
Balloons: roughly $2.00 per bag at Wal-Mart.
After Samuel, and his bunk-mate, Xavier were sound asleep the night before his birthday, I snuck into their room all Tooth Fairy-like and littered their floor with balloons, which I thought would be a really fun way to wake up in the morning.
Unfortunately, that "fun" waking-up happened at 5:30 in the morning when Xavier (who has a whisper that sounds like a Mack truck firing up on a cold winter morning,) saw the balloons first, and informed Samuel that it was his birthday!! I had to go into their room and tell them to calm down and try to go back to sleep until 7 am, since they both had school in a few hours!
Still fun, but maybe not a good idea for light sleepers, or kids who go to the bathroom frequently at night.
Another fun idea I had was to decorate the ceiling with crepe paper!
My mother-in-law's 50th birthday party was a few weeks ago, and I used black crepe paper in lines stretching from one side of the room to the other, which created a kind of canopy.
This time, my husband thought it would be more fun if the lines were more random across the ceiling. When I got done, he asked, "There now wasn't that easier, not having to be so exact?"
If you know anything about me, it's that I don't do random very well, so I found myself analyzing each piece wondering if I had too much yellow in one spot, or if there were too many blank spaces in one area of the room, etc.
And since my husband knows about most of my faults better than I do, I answered honestly, "No, it was definitely not easier this way."
He laughed, kissed my forehead, and thanked me for trying anyway. **gushing**
Isn't he great?
Samuel, on the other hand loved the effect, and felt very special.
Total cost: $3.75 at Wal-Mart
Finally, I won Mother of the Year award when I told Samuel I would bring his lunch to school later, and then showed up at his classroom as they were leaving for lunch with a McDonald's Happy Meal. All his friends gasped with jealousy, he turned bright red, and I got a huge hug when he got home from school! (Cost $4.)
This all sounds like a lot of effort for one child, and no effort for the one-year-old, right?
Zoram couldn't have balloons in his room because he shares a room with troublemaker #3 (Rora) who loves to share fun things with Zoram by putting them into his crib for him. Ababy toddler sleeping with balloons in his crib didn't sound that safe to me, so we skipped that part and let him play with Samuel's balloons (supervised) while his older brothers were at school.
He could have cared less about the crepe-paper ceiling, but since he loves fries, and it was his birthday, I let him just eat McDonald's fries for lunch.
So, there are a few simple ideas costing around $10!!
You would think that with 365 days in a year, I would be able to give my kids each their own special day . . . nope!!
It's been a lot of fun so far because Samuel (my oldest) is so smitten with his baby brother, and Zoram (my youngest) is only 1.
We had a fun day yesterday, and there was not much money spent, so I thought I would share a few fun celebration ideas with you:
Balloons: roughly $2.00 per bag at Wal-Mart.
After Samuel, and his bunk-mate, Xavier were sound asleep the night before his birthday, I snuck into their room all Tooth Fairy-like and littered their floor with balloons, which I thought would be a really fun way to wake up in the morning.
Unfortunately, that "fun" waking-up happened at 5:30 in the morning when Xavier (who has a whisper that sounds like a Mack truck firing up on a cold winter morning,) saw the balloons first, and informed Samuel that it was his birthday!! I had to go into their room and tell them to calm down and try to go back to sleep until 7 am, since they both had school in a few hours!
Still fun, but maybe not a good idea for light sleepers, or kids who go to the bathroom frequently at night.
Another fun idea I had was to decorate the ceiling with crepe paper!
My mother-in-law's 50th birthday party was a few weeks ago, and I used black crepe paper in lines stretching from one side of the room to the other, which created a kind of canopy.
This time, my husband thought it would be more fun if the lines were more random across the ceiling. When I got done, he asked, "There now wasn't that easier, not having to be so exact?"
If you know anything about me, it's that I don't do random very well, so I found myself analyzing each piece wondering if I had too much yellow in one spot, or if there were too many blank spaces in one area of the room, etc.
And since my husband knows about most of my faults better than I do, I answered honestly, "No, it was definitely not easier this way."
He laughed, kissed my forehead, and thanked me for trying anyway. **gushing**
Isn't he great?
Samuel, on the other hand loved the effect, and felt very special.
Total cost: $3.75 at Wal-Mart
Finally, I won Mother of the Year award when I told Samuel I would bring his lunch to school later, and then showed up at his classroom as they were leaving for lunch with a McDonald's Happy Meal. All his friends gasped with jealousy, he turned bright red, and I got a huge hug when he got home from school! (Cost $4.)
This all sounds like a lot of effort for one child, and no effort for the one-year-old, right?
Zoram couldn't have balloons in his room because he shares a room with troublemaker #3 (Rora) who loves to share fun things with Zoram by putting them into his crib for him. A
He could have cared less about the crepe-paper ceiling, but since he loves fries, and it was his birthday, I let him just eat McDonald's fries for lunch.
So, there are a few simple ideas costing around $10!!
Wednesday, September 29, 2010
redemption
I just couldn't leave that sugar cookie recipe as poorly represented as it was last time I made them.
I made them again, and I'm not sure what the difference was, but they were less dry than the last batch of dough (hmm . . . I must have miscounted scoops of flour.)
Rora got a strawberry cookie cutter in a happy meal that she was dying to use, so we decided to make shapes this time. We made strawberries, some fun fall leaves, and I did one ball just to prove that it works!
They came out beautifully!
Whew! I feel much better now.
I made them again, and I'm not sure what the difference was, but they were less dry than the last batch of dough (hmm . . . I must have miscounted scoops of flour.)
Rora got a strawberry cookie cutter in a happy meal that she was dying to use, so we decided to make shapes this time. We made strawberries, some fun fall leaves, and I did one ball just to prove that it works!
They came out beautifully!
Whew! I feel much better now.
Tuesday, September 28, 2010
buried
With 1 load of dishes, various pots and pans, and roughly 12 loads of laundry to do today, I'm afraid my sewing machine will be sitting idle today, and you will just have to wait another day for something more exciting to read.
How do those other crafty girls do it?! If I keep my house clean, I can't manage to find time to craft. If I craft, it's at the expense of cleanliness (household, and sometimes personal!)
Wish me luck! I'll keep you updated as the day goes on!
**Update:** (3:00 pm MST on 9-29-10)
dishes - finished
pots & pans - clean & put away
kitchen - clean
laundry - 9 loads finished, 2 loads in process, 2 loads to go (almost done.)
How do those other crafty girls do it?! If I keep my house clean, I can't manage to find time to craft. If I craft, it's at the expense of cleanliness (household, and sometimes personal!)
Wish me luck! I'll keep you updated as the day goes on!
**Update:** (3:00 pm MST on 9-29-10)
dishes - finished
pots & pans - clean & put away
kitchen - clean
laundry - 9 loads finished, 2 loads in process, 2 loads to go (almost done.)
Friday, September 24, 2010
fabric pumpkins
There are a lot of pumpkin ideas out there on the internet, so I thought I'd throw mine into the mix.
I'm proud to say that I made my own pattern . . . perfected through trial and error.
I'll show you the ones that went horribly wrong--because they're good for a laugh:
Contestant #1:
The idea behind this one was that if I made the sections twice as wide, the pumpkin would end up shorter and fatter. Unfortunately, you can see that the middle of each segment was not tall enough, so I made more of a mutant star fish than anything else!
Contestant #2:
With this one, I was trying to create that crease that runs between segments on a real pumpkin, so I put a dart on each side of each segment. Let's just say this was not what I had in mind . . .
Turns out my best option was to make a ball, then run a string from the bottom to the top, and back again. Then I tied them tightly, which pulled the ends toward each other, creating the dimples on the top and bottom. After that, I added a stem.
And then made three more.
They make me happy!
I'm proud to say that I made my own pattern . . . perfected through trial and error.
I'll show you the ones that went horribly wrong--because they're good for a laugh:
Contestant #1:
The idea behind this one was that if I made the sections twice as wide, the pumpkin would end up shorter and fatter. Unfortunately, you can see that the middle of each segment was not tall enough, so I made more of a mutant star fish than anything else!
Contestant #2:
With this one, I was trying to create that crease that runs between segments on a real pumpkin, so I put a dart on each side of each segment. Let's just say this was not what I had in mind . . .
Turns out my best option was to make a ball, then run a string from the bottom to the top, and back again. Then I tied them tightly, which pulled the ends toward each other, creating the dimples on the top and bottom. After that, I added a stem.
And then made three more.
They make me happy!
Thursday, September 23, 2010
high altitude sugar cookies
I've made this recipe before, and I love it because it's the first sugar cookie recipe I've found that was already adjusted for high altitude, which is a must for someone living in Utah.
I searched for a long time for this recipe because every other sugar cookie recipe I'd tried came out like puddles of mush. They didn't hold their shape when I used cookie cutters, and I couldn't figure out how to make them right.
I tried adjusting by putting more flour in, but then they tasted like . . . well, flour. They held their shape, but weren't any good to eat.
I did a google search for high altitude recipes, and I wish I could remember where I got this one, but I found it after trying several. (If this is your recipe, please let me know so I can give you credit!)
**Edited: I found the blog with the recipe I used. Check out High Altitude Cooking!!
I wanted something simple to share for my first "real" post on my new blog, and I'm thinking this might be a bad omen, but in the interest of full disclosure, I'm posting it anyway.
First, I'll share the recipe, and hopefully, you'll make it, it'll come out beautifully, and then I'll share what happened:
High Altitude Simple Sugar Cookies
1 cup butter (softened)
1 cup sugar
1 large egg
1-1/2 tsp vanilla
3 cups flour
1-1/4 tsp baking powder
Directions:
1. Cream together butter and sugar until smooth.
2. Mix in egg and vanilla.
3. In a separate bowl, combine flour and baking powder.
4. Add flour mixture to wet ingredients in intervals, mixing between.
5. Divide dough into 4 parts and refridgerate for 1 hour.
6. Roll out dough between two pieces of wax paper to 1/4-1/2 inch thickness.
7. Cut shapes and arrange onto a cookie sheet.
8. Bake for 7-8 minutes at 375 degrees.
or
6. Spoon 1 inch balls onto a cookie sheet.
7. Bake for 7-8 minutes at 375 degrees.
Done baking?
Okay, read on . . .
I started this recipe at night, and by the time the 1 hour refrigeration was done, I was too tired to bake them, so I just left them in the fridge until morning.
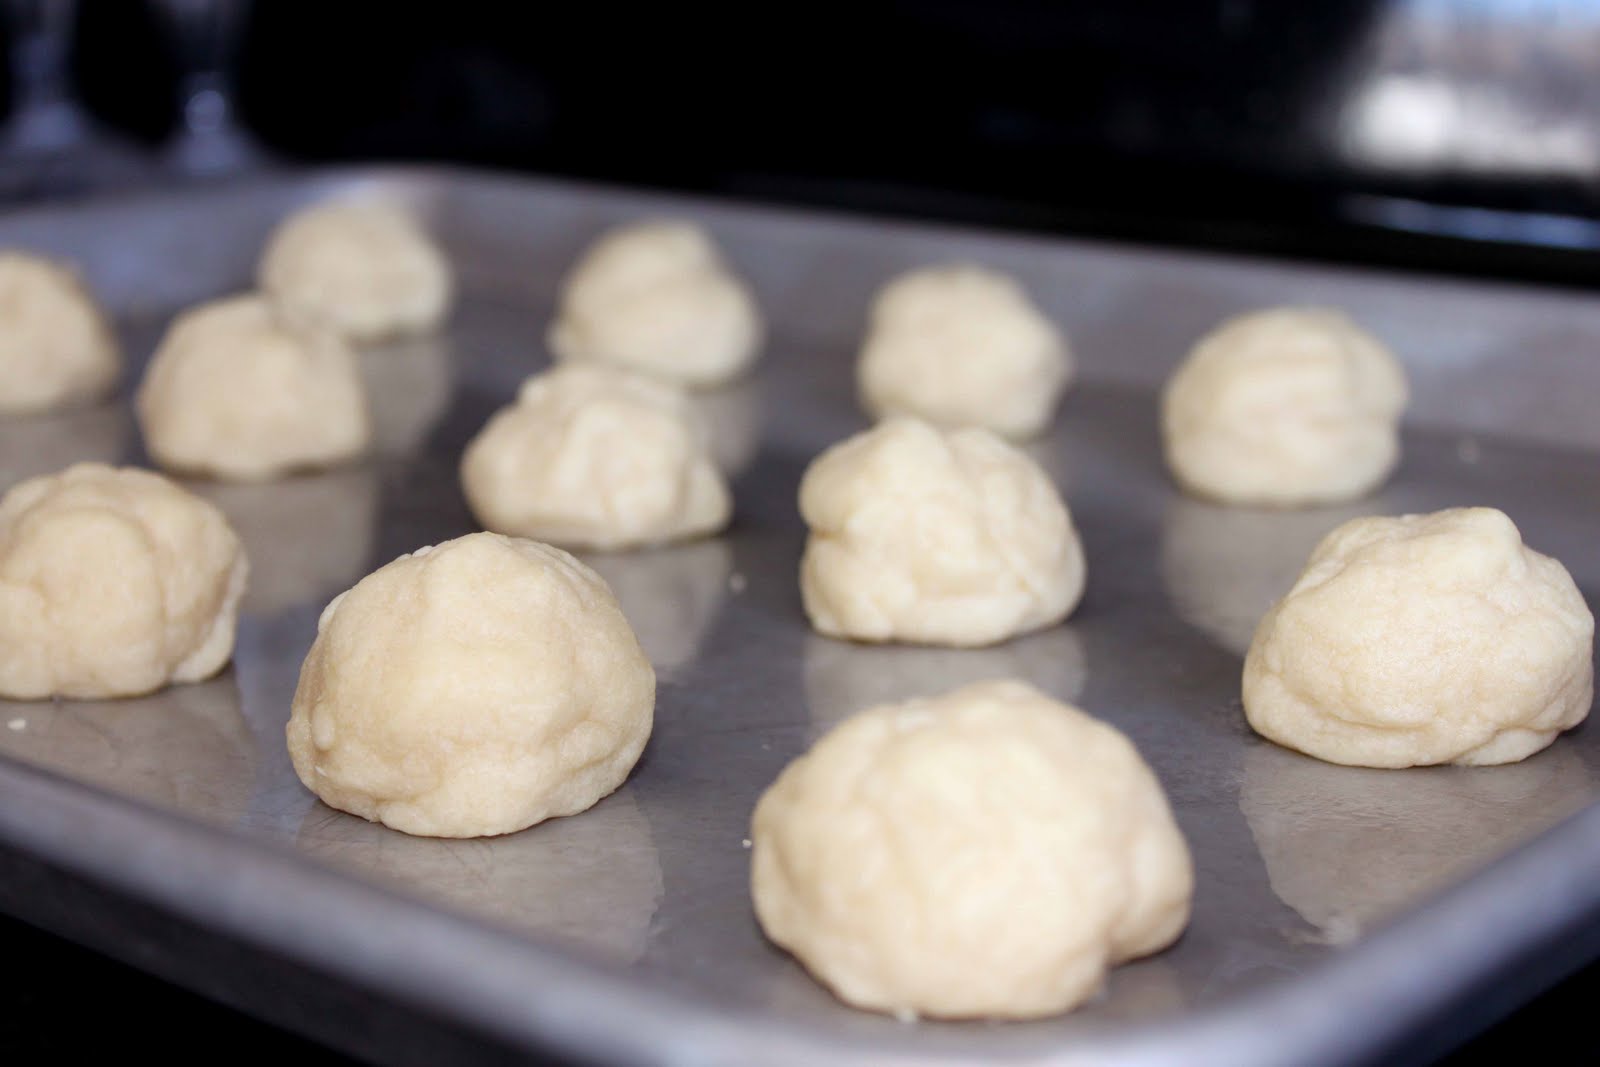
The next morning, I decided to make round sugar cookies, so I spooned balls onto a cookie sheet and baked them.
What you are looking at are the baked cookies--not the unbaked cookies!
They didn't flatten out!! (Picture me with my brow furrowed and my head cocked to one side.)
I still can't figure out why. Anybody?
Too long in the fridge?
On the plus side, they were slightly doughy inside, which is how my husband likes them anyway.
And the troublemakers enjoyed them:
Including the smallest troublemaker!
Aren't kids wonderful?! My five-year-old actually told me they were delicious!
I searched for a long time for this recipe because every other sugar cookie recipe I'd tried came out like puddles of mush. They didn't hold their shape when I used cookie cutters, and I couldn't figure out how to make them right.
I tried adjusting by putting more flour in, but then they tasted like . . . well, flour. They held their shape, but weren't any good to eat.
I did a google search for high altitude recipes, and I wish I could remember where I got this one, but I found it after trying several. (If this is your recipe, please let me know so I can give you credit!)
**Edited: I found the blog with the recipe I used. Check out High Altitude Cooking!!
I wanted something simple to share for my first "real" post on my new blog, and I'm thinking this might be a bad omen, but in the interest of full disclosure, I'm posting it anyway.
First, I'll share the recipe, and hopefully, you'll make it, it'll come out beautifully, and then I'll share what happened:
High Altitude Simple Sugar Cookies
1 cup butter (softened)
1 cup sugar
1 large egg
1-1/2 tsp vanilla
3 cups flour
1-1/4 tsp baking powder
Directions:
1. Cream together butter and sugar until smooth.
2. Mix in egg and vanilla.
3. In a separate bowl, combine flour and baking powder.
4. Add flour mixture to wet ingredients in intervals, mixing between.
5. Divide dough into 4 parts and refridgerate for 1 hour.
6. Roll out dough between two pieces of wax paper to 1/4-1/2 inch thickness.
7. Cut shapes and arrange onto a cookie sheet.
8. Bake for 7-8 minutes at 375 degrees.
or
6. Spoon 1 inch balls onto a cookie sheet.
7. Bake for 7-8 minutes at 375 degrees.
Done baking?
Okay, read on . . .
I started this recipe at night, and by the time the 1 hour refrigeration was done, I was too tired to bake them, so I just left them in the fridge until morning.
The next morning, I decided to make round sugar cookies, so I spooned balls onto a cookie sheet and baked them.
What you are looking at are the baked cookies--not the unbaked cookies!
They didn't flatten out!! (Picture me with my brow furrowed and my head cocked to one side.)
I still can't figure out why. Anybody?
Too long in the fridge?
On the plus side, they were slightly doughy inside, which is how my husband likes them anyway.
And the troublemakers enjoyed them:
Including the smallest troublemaker!
Aren't kids wonderful?! My five-year-old actually told me they were delicious!
Wednesday, September 22, 2010
welcome!
Welcome to my new blog! I'm very excited and feel like I'm starting a new adventure!
Take a look around. Most of the content on here now was written and published while I was a part of Sew Saucy. If you like what you see, take a button and/or become a follower!
I have lots of plans for the future. October is going to be big with baking, crafts, and costumes I've sewn in the past, as well as this years' four new costumes for my four little troublemakers.
Don't forget to check back tomorrow for a recipe disaster . . . I had the best of intentions for making a good first impression, but it just didn't work out that way! *sigh*
Take a look around. Most of the content on here now was written and published while I was a part of Sew Saucy. If you like what you see, take a button and/or become a follower!
I have lots of plans for the future. October is going to be big with baking, crafts, and costumes I've sewn in the past, as well as this years' four new costumes for my four little troublemakers.
Don't forget to check back tomorrow for a recipe disaster . . . I had the best of intentions for making a good first impression, but it just didn't work out that way! *sigh*
Monday, August 16, 2010
baby quilt gift
My husband needed a gift for a co-worker whose wife is about to have their first baby - a girl.
So, I made up my own simple design for this quilt top. It didn't quite come out as I envisioned it (sigh.) But, I like it nonetheless. I should have used a third color for either the big squares, or the small pink squares. Oh, well. Live and learn, I guess.
I love how the black backing and the black blanket binding really made the top "pop!"
Thursday, August 12, 2010
mama's skirt (mccall's 5631)
I have been talking about the things I'm making for a care package to be sent to Texas for the arrival of my best friend's final baby. The big sisters are getting paper-sewn notebooks with crayon rolls, the baby will be getting the rag tag baby quilt, and now for mom . . .
I believe every woman who has a baby needs something cute to wear. Not necessarily home from the hospital, but when she gets back to her old shape (or close, anyway.) My cute friend usually takes a mere six weeks to get back into her old jeans,--yes, you may all puke now--so by the time she's ready to take her baby out amongst people, she should look snazzy in this little number!
The final gift is for dad, and will not be sewn. (I know, you're disappointed.) Dad is going to get a cd of lively music to keep him awake during the morning commute after the new baby has kept him up all night.
With three weeks until the due date, all these surprises will be sent off tomorrow . . . not a moment too soon!
I believe every woman who has a baby needs something cute to wear. Not necessarily home from the hospital, but when she gets back to her old shape (or close, anyway.) My cute friend usually takes a mere six weeks to get back into her old jeans,--yes, you may all puke now--so by the time she's ready to take her baby out amongst people, she should look snazzy in this little number!
The final gift is for dad, and will not be sewn. (I know, you're disappointed.) Dad is going to get a cd of lively music to keep him awake during the morning commute after the new baby has kept him up all night.
With three weeks until the due date, all these surprises will be sent off tomorrow . . . not a moment too soon!
Wednesday, August 11, 2010
delay
More sewing is coming, I promise. I was getting my into a sewing groove when I had a bit of a delay while I dealt with this:
Ah, the joys of motherhood . . .
At least she's sorry.
Ah, the joys of motherhood . . .
At least she's sorry.
Tuesday, August 10, 2010
noodlehead gathered clutch
Anna at Noodlehead has an adorable gathered clutch that I've been wanting to make. I love all of it . . . except for the part where you take the cute gathers you've created and mash them down and iron them, making them look like they've been sitting in the dryer too long.
I made the clutch, but I took a few liberties. When it came to the part about ironing the gathers in place, and adding interfacing to the back, I ran a gathering stitch along the top and bottom of my gathered fabric, gathered it, and sewed it onto an additional piece of fabric with the interfacing attached to it. That way, I could leave my gathers a little more puffy looking, which I love.

I think it's so adorable, and it has a card holder inside, which is nice so that I don't have to take my entire wallet with me, either.
I'm curious . . . what do you think about the changes? Do you like it better with the flat gathers, or the puffy ones?
I made the clutch, but I took a few liberties. When it came to the part about ironing the gathers in place, and adding interfacing to the back, I ran a gathering stitch along the top and bottom of my gathered fabric, gathered it, and sewed it onto an additional piece of fabric with the interfacing attached to it. That way, I could leave my gathers a little more puffy looking, which I love.
(I used leftover fabric from Rora's skirt, and scraps from a new project I just cut out.)

I think it's so adorable, and it has a card holder inside, which is nice so that I don't have to take my entire wallet with me, either.
I'm curious . . . what do you think about the changes? Do you like it better with the flat gathers, or the puffy ones?
Monday, August 9, 2010
planned spontaneity
Sometimes I dream of creating my own patterns; being spontaneous; taking scissors, fabric, and my sewing machine, and just creating; doing what just seems to come natural to Sarah. I'll even say it right out loud . . . I'm jealous. I was absolutely baffled that just months after learning to sew, Sarah had created her own little sundress.
I'm a planner. I can't do much of anything without planning both a primary plan and a back-up plan. I try to be easy-going and go with the flow, but only so long as it fits within my planned parameters. I use patterns because they make me feel safe--as long as I measure, cut, and sew exactly, I can't mess it up (reads fail.) Yes, I have issues, but we can talk about that later.
So, I planned to be more like Sarah . . .
I wanted to make a skirt for Rora. I wanted it to have a flat top, a bubble hem, and maybe a gather somewhere in between. I wanted buttons down the side and cute, flowing fabric.
I made a pattern: there were drawings, measurements, and more drawings. (I guess I'm not all that good at spontaneity!)

Whether it was over-planned or not, I feel like it came out okay. There are still things I want to do to tweak my pattern, but I'll probably use it again.
I feel proud of myself. I stretched outside my comfort zone of using a pattern that someone else has perfected. I feel like I just created my very first pattern!!
Just wait . . . this has created a monster. There are more plans for spontaneity in the future!
I'm a planner. I can't do much of anything without planning both a primary plan and a back-up plan. I try to be easy-going and go with the flow, but only so long as it fits within my planned parameters. I use patterns because they make me feel safe--as long as I measure, cut, and sew exactly, I can't mess it up (reads fail.) Yes, I have issues, but we can talk about that later.
So, I planned to be more like Sarah . . .
I wanted to make a skirt for Rora. I wanted it to have a flat top, a bubble hem, and maybe a gather somewhere in between. I wanted buttons down the side and cute, flowing fabric.
I made a pattern: there were drawings, measurements, and more drawings. (I guess I'm not all that good at spontaneity!)
Whether it was over-planned or not, I feel like it came out okay. There are still things I want to do to tweak my pattern, but I'll probably use it again.
I feel proud of myself. I stretched outside my comfort zone of using a pattern that someone else has perfected. I feel like I just created my very first pattern!!
Just wait . . . this has created a monster. There are more plans for spontaneity in the future!
Tuesday, August 3, 2010
paper sewing
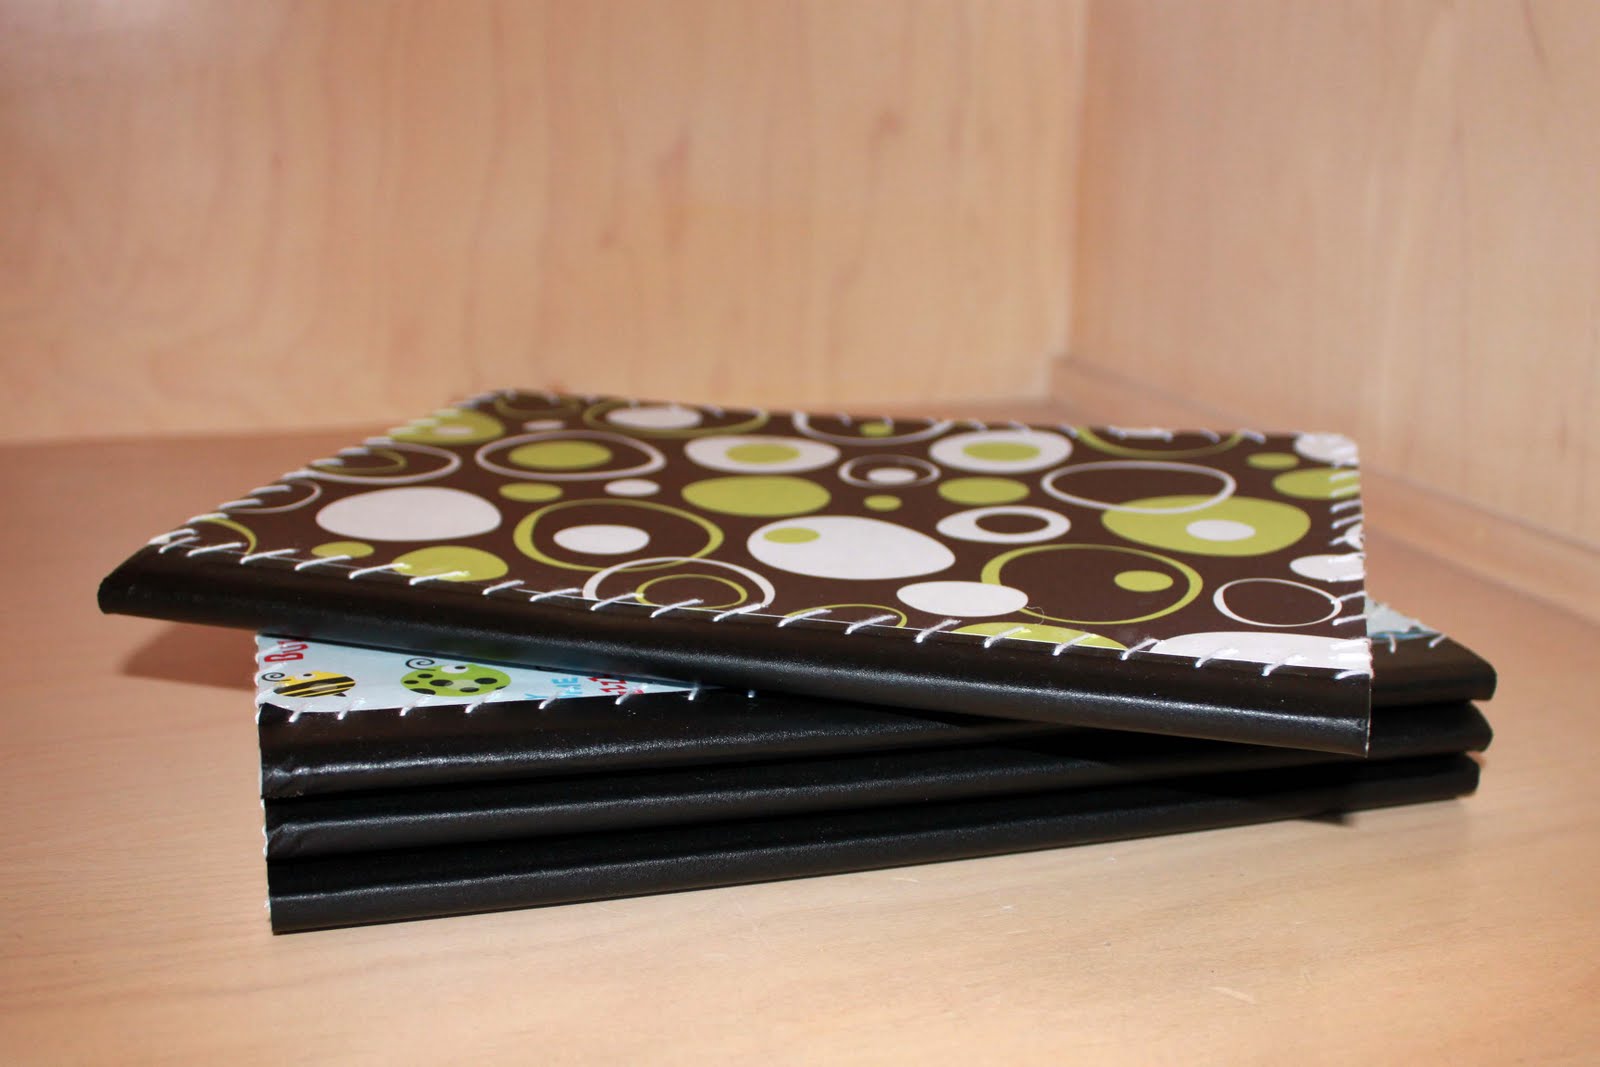
A women's organization that I belong to gave me a notebook at the beginning of the year. It was a simple, college ruled notebook. They instructed me to make it my own. So, I did. I covered it in cute paper, embellished it with my graveyard of scrapbooking stuff that I haven't used since I started using digital scrapbooking, and made it cute. One of the "design elements" I used was to sew big, chunky stitches through the edge of the front cover to represent my love affair with sewing.
Unfortunately, I made the notebook a little too much my own, because just like everything else in my 4-child household, eventually it fell apart. The flowers fell off, the glue didn't hold, and the cute paper began to peel . . . everywhere except where I had sewn through it!
And that inspired this little project:
My best friend is having her 5th and final child in a little over a month. She lives in Texas, and I wanted to send her family a package with something for each member of the family to have when the new baby arrives. I decided to capitalize on the Back to School sales and pick up notebooks and crayons. The crayons will be housed in crayon rolls.
Unfortunately, I made the notebook a little too much my own, because just like everything else in my 4-child household, eventually it fell apart. The flowers fell off, the glue didn't hold, and the cute paper began to peel . . . everywhere except where I had sewn through it!
And that inspired this little project:
My best friend is having her 5th and final child in a little over a month. She lives in Texas, and I wanted to send her family a package with something for each member of the family to have when the new baby arrives. I decided to capitalize on the Back to School sales and pick up notebooks and crayons. The crayons will be housed in crayon rolls.
For the notebooks, I traced around them onto fun scrapbook paper, glued it on, marked where I wanted the holes, and then sewed around the edges with thick thread/thin yarn. It was a simple and fun little craft for the new baby's four older sisters!!
Stay tuned to find out what makes it into the package for Mom and Dad!!
Subscribe to:
Posts (Atom)