Wednesday, September 29, 2010

redemption

I just couldn't leave that sugar cookie recipe as poorly represented as it was last time I made them.

I made them again, and I'm not sure what the difference was, but they were less dry than the last batch of dough (hmm . . . I must have miscounted scoops of flour.)

Rora got a strawberry cookie cutter in a happy meal that she was dying to use, so we decided to make shapes this time.  We made strawberries, some fun fall leaves, and I did one ball just to prove that it works!


They came out beautifully!


Whew!  I feel much better now.

Tuesday, September 28, 2010

buried

With 1 load of dishes, various pots and pans, and roughly 12 loads of laundry to do today, I'm afraid my sewing machine will be sitting idle today, and you will just have to wait another day for something more exciting to read.

How do those other crafty girls do it?!  If I keep my house clean, I can't manage to find time to craft.  If I craft, it's at the expense of cleanliness (household, and sometimes personal!)

Wish me luck!  I'll keep you updated as the day goes on!

**Update:** (3:00 pm MST on 9-29-10)
dishes - finished
pots & pans - clean & put away
kitchen - clean
laundry - 9 loads finished, 2 loads in process, 2 loads to go (almost done.)

Friday, September 24, 2010

fabric pumpkins

There are a lot of pumpkin ideas out there on the internet, so I thought I'd throw mine into the mix.

I'm proud to say that I made my own pattern . . . perfected through trial and error.

I'll show you the ones that went horribly wrong--because they're good for a laugh:

Contestant #1:
The idea behind this one was that if I made the sections twice as wide, the pumpkin would end up shorter and fatter.  Unfortunately, you can see that the middle of each segment was not tall enough, so I made more of a mutant star fish than anything else!


Contestant #2:
With this one, I was trying to create that crease that runs between segments on a real pumpkin, so I put a dart on each side of each segment.  Let's just say this was not what I had in mind . . .

Turns out my best option was to make a ball, then run a string from the bottom to the top, and back again.  Then I tied them tightly, which pulled the ends toward each other, creating the dimples on the top and bottom.  After that, I added a stem.


And then made three more.


They make me happy!

Thursday, September 23, 2010

high altitude sugar cookies

I've made this recipe before, and I love it because it's the first sugar cookie recipe I've found that was already adjusted for high altitude, which is a must for someone living in Utah.

I searched for a long time for this recipe because every other sugar cookie recipe I'd tried came out like puddles of mush.  They didn't hold their shape when I used cookie cutters, and I couldn't figure out how to make them right.

I tried adjusting by putting more flour in, but then they tasted like . . . well, flour.  They held their shape, but weren't any good to eat.

I did a google search for high altitude recipes, and I wish I could remember where I got this one, but I found it after trying several.  (If this is your recipe, please let me know so I can give you credit!)

**Edited: I found the blog with the recipe I used.  Check out High Altitude Cooking!!

I wanted something simple to share for my first "real" post on my new blog, and I'm thinking this might be a bad omen, but in the interest of full disclosure, I'm posting it anyway.

First, I'll share the recipe, and hopefully, you'll make it, it'll come out beautifully, and then I'll share what happened:

High Altitude Simple Sugar Cookies


1 cup butter (softened)
1 cup sugar
1 large egg
1-1/2 tsp vanilla
3 cups flour
1-1/4 tsp baking powder


Directions:
1.  Cream together butter and sugar until smooth.
2.  Mix in egg and vanilla.
3.  In a separate bowl, combine flour and baking powder.
4.  Add flour mixture to wet ingredients in intervals, mixing between.
5.  Divide dough into 4 parts and refridgerate for 1 hour.
6.  Roll out dough between two pieces of wax paper to 1/4-1/2 inch thickness.
7.  Cut shapes and arrange onto a cookie sheet.
8.  Bake for 7-8 minutes at 375 degrees.

or

6.  Spoon 1 inch balls onto a cookie sheet.
7.  Bake for 7-8 minutes at 375 degrees.


Done baking?

Okay, read on . . .

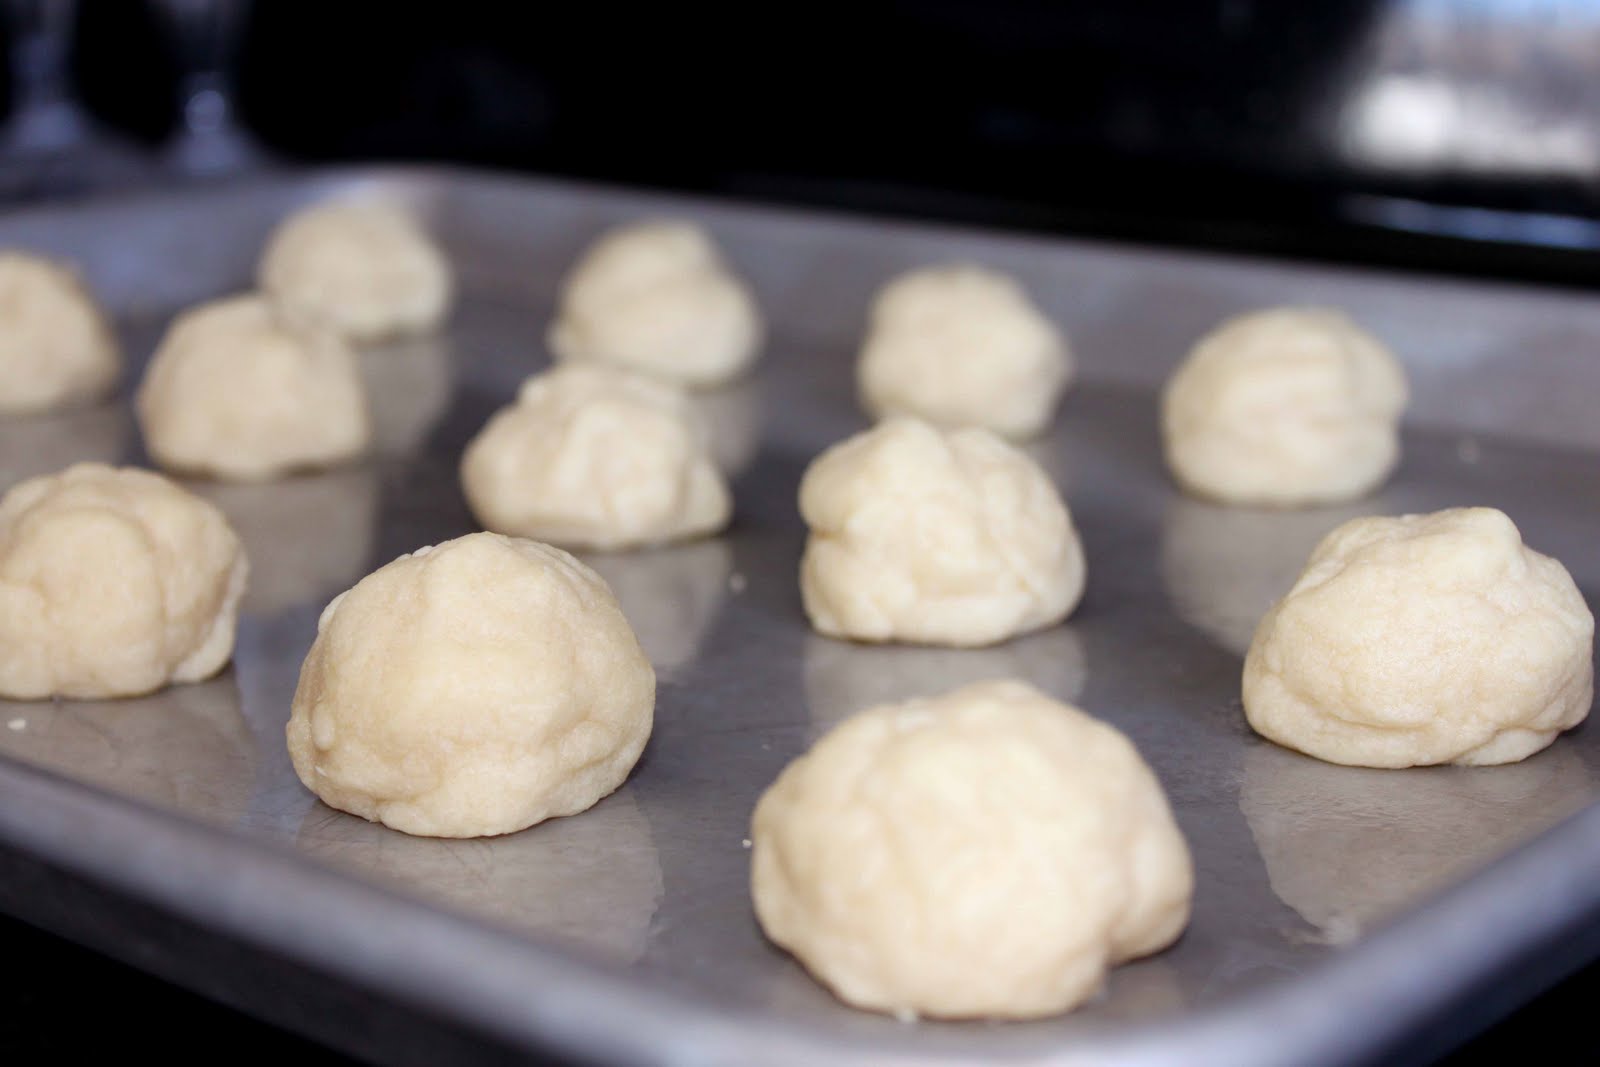
I started this recipe at night, and by the time the 1 hour refrigeration was done, I was too tired to bake them, so I just left them in the fridge until morning. 

The next morning, I decided to make round sugar cookies, so I spooned balls onto a cookie sheet and baked them.


What you are looking at are the baked cookies--not the unbaked cookies!


They didn't flatten out!!  (Picture me with my brow furrowed and my head cocked to one side.)

I still can't figure out why.  Anybody? 

Too long in the fridge?

On the plus side, they were slightly doughy inside, which is how my husband likes them anyway.

And the troublemakers enjoyed them:

Including the smallest troublemaker!


Aren't kids wonderful?!  My five-year-old actually told me they were delicious!

Wednesday, September 22, 2010

welcome!

Welcome to my new blog!  I'm very excited and feel like I'm starting a new adventure!

Take a look around.  Most of the content on here now was written and published while I was a part of Sew Saucy.  If you like what you see, take a button and/or become a follower!

I have lots of plans for the future.  October is going to be big with baking, crafts, and costumes I've sewn in the past, as well as this years' four new costumes for my four little troublemakers.

Don't forget to check back tomorrow for a recipe disaster . . . I had the best of intentions for making a good first impression, but it just didn't work out that way!  *sigh*