
When it comes to home decor, I'm somewhat of a decorating dud.
I can pick out colors that match, clash, coordinate, etc. That's not the problem.
I can arrange a room in a practical manner, but I just don't have an eye for home decor.
You know those women whose homes look like they could be photographed for Better Homes and Gardens or the Pottery Barn catalogue? You know the ones. They have unique, adorable furniture. Knick knacks all over the place with no practicality, but they really pull the room together without making it feel cluttered? That's not me.
However, every now and then I make an effort at adding something to our home to make it unique, and a little more ours.
That's what I did yesterday, and I've once again born my weakness for all to see.
I took a left-over bottle from some Sparkling Cider, and tried to make it into something cute to put . . . well, I don't know, but somewhere. I hadn't planned that far ahead, but in the back of my mind, I pictured it on top of my cupboards in the kitchen, or maybe on the large entertainment center in the front room which now houses toys and games. Whatever the subconscious plan, it doesn't matter now.
I took that bottle from this:

to this:

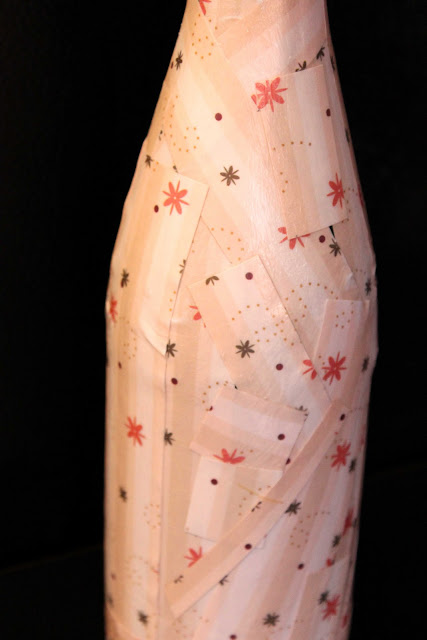
It's probably not as horrible as I made it sound, but it's not something really cute, either. I tried to step outside my comfort zone and go for random . . . and this is why I don't do random. It just looks like a sloppy, wrinkled mess.
I need help, people. Someone tell me whether this is worth keeping?
Should I cover it in plain brown paper, or will that make it look like I'm some kind of drunk trying to hide my bottle during biology class?
Should I just throw it out?
Is there something out there that I could pair it with that would make my sad, sad bottle look less out of place wherever I set it down?
Help!!
Sincerely,
the Decorating Dud


